Friday 18 December 2015

Wordpress : Managing Plugins

WordPress Plugins are composed of PHP scripts that extend the functionality of WordPress. They offer new additions to your blog that either enhance features that were already available or add otherwise unavailable new features to your site.
The majority of WordPress users don't require Plugins, or only require a few, such as Plugins dealing with comment spam or customized post listings. Other users enjoy the varied options Plugins provide such as frequently updated weather reports, post word counts, rating systems, and more. WordPress Plugins are optional, based upon the needs of the user, and thus they are not incorporated into the core of WordPress.
Plugins available via the WordPress Plugins Directory site are designed by volunteers and are usually free to the public. WordPress Plugins hosted in the WordPress Plugins Directory are considered thoroughly tested and "safe." Remember, WordPress Plugins are the responsibility of the author and the user, and they are typically works-in-progress as WordPress grows and expands.

If you want to develop your own Plugins, there is a comprehensive list of resources atPlugin Resources.

Finding Plugins

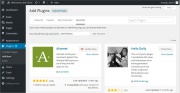
You can find WordPress Plugins in the Administration Screens > Plugins > Add Newscreen, or directly via the WordPress Plugins Directory.

Plugin Compatibility and Updates

Check the WordPress Plugin listing on the Plugins List on your WordPress site, or on the WordPress Plugins Directory to determine compatibility and if updates are available.
If a WordPress Plugin update is available, it will be shown on the Dashboard screen, an alert on the Plugin's menu title, and on the Plugin List. Follow the instructions to update the Plugin.
If a WordPress Plugin is not compatible or updated for the next release of WordPress, contact the Plugin author directly for information on the next update and compatibility issues.

Installing Plugins

Automatic Plugin Installation


WordPress Plugins Screen
To add a WordPress Plugin using the built-in plugin installer:
  1. Go to Plugins > Add New.
  2. Type in the name of the WordPress Plugin or descriptive keyword, author, or tag in Search Plugins box or click a tag link below the screen.
  3. Find the WordPress Plugin you wish to install.
    1. Click Details for more information about the Plugin and instructions you may wish to print or save to help setup the Plugin.
    2. Click Install Now to install the WordPress Plugin.
  4. The resulting installation screen will list the installation as successful or note any problems during the install.
  5. If successful, click Activate Plugin to activate it, or Return to Plugin Installer for further actions.
Some WordPress Plugins require more steps to customize them. The Details ReadMe file should contain step-by-step instructions. After installation, this information is available on the Plugins Screen for each Plugin. If you are having problems with a WordPress Plugin, see the Troubleshooting section.
For information on how to install a WordPress Plugin manually, see our manual installation guide below.

Manual Plugin Installation

There are a few cases when manually installing a WordPress Plugin is appropriate.
  • If you wish to control the placement and process of installing a WordPress Plugin.
  • If your server does not permit automatic installation of a WordPress Plugin.
  • The WordPress Plugin is not in the WordPress Plugins Directory.
Installation of a WordPress Plugin manually requires FTP familiarity and the awareness that you may put your site at risk if you install a WordPress Plugin incompatible with the current version or from an unreliable source.
Backup your site completely before proceeding.
To install a WordPress Plugin manually:
  1. Download your WordPress Plugin to your desktop.
  2. If downloaded as a zip archive, extract the Plugin folder to your desktop.
  3. Read through the "readme" file thoroughly to ensure you follow the installation instructions.
  4. With your FTP program, upload the Plugin folder to the wp-content/plugins folder in your WordPress directory online.
  5. Go to Plugins screen and find the newly uploaded Plugin in the list.
  6. Click Activate to activate it.
Check the Details readme file for customization and further instructions.

Plugin Favorites

The ability to favorite a plugin was added to the WordPress Plugins Directory in 2012. WordPress Version 3.5 introduced the ability to display and easily install a user's favorite plugins from the Add New plugins page of the dashboard.

WordPress Plugins Directory


A favorite plugin in WordPress Plugins Directory
To favorite a plugin:
  1. You must be logged in to the WordPress Plugins Directory
  2. While you are viewing a plugin's page, click the Favorite link below the plugin's download button.
Once you have favorited a plugin, it will show up in your public profile, as well as your rating of the plugin, if applicable.

Installing Favorite Plugins


Viewing a user's favorite plugins in the dashboard
To install plugins from a user's list of favorites within the WordPress dashboard:
  1. Go to Plugins > Add New.
  2. Under Favorites, type in the WordPress.org username of the user who's favorites you would like to install and click Get Favorites.
  3. Follow the Installing Plugins above to install the plugins you would like.

Troubleshooting

Occasionally, a WordPress Plugin may not work as expected, or at all, or conflict with another WordPress Plugin.
  1. Check you've followed the instructions included with the WordPress Plugin exactly.
  2. Check that the Plugin has been activated in your Plugin Screen of your Administration Screens.
  3. Deactivate and re-activate the Plugin to see if this makes it work.
  4. Search the WordPress Support Forums for the name of the Plugin and keywords associated with the problem you are experiencing.
  5. Check the WordPress Plugins Directory for the notes on the Plugin and links to issues reported in the Forums.
  6. Go to the website of the Plugin author and check their blog and Plugin page for known issues or advice.
  7. Search the web with the name of the Plugin and keywords associated with the trouble.
  8. Post a question on the WordPress Support Forums with the name of the Plugin and specific problems in the title. For advice on how to improve your chances of getting help, see Finding WordPress Help.
  9. If the problem persists and you cannot seem to solve it, check to see if there are any similar WordPress Plugins that you can try instead.
  10. Try the following tips below for troubleshooting the problem yourself if you have no fear of going "under the hood."

Advanced Troubleshootings

If you are experiencing problems with a Plugin you installed or one that stopped working after upgrades, the following are the steps you need to take to troubleshoot the Plugin:
  1. If you manually installed the Plugin, use your FTP program to delete the Plugin folder/files and upload it again.
  2. If you made changes to the WordPress Theme template files to add the Plugin's code or customization, make sure they are correct, spelled right (including letter case), and placed in the appropriate place, e.g., within the WordPress Loop or outside of it.
  3. Check that you uploaded the file to the Plugins folder under wp-content. If you are uploading a new version to replace the old, delete the old version prior to uploading the new one.
  4. If the Plugin does not appear in the Plugins List, view the Plugin's main file in the Plugin Editor to ensure the Plugin's header textexists and is properly formed.
  5. If you're using a custom WordPress Theme, try using one of the default WordPress Themes to see if your issue is Theme related. If it is, contact the Theme developer for assistance.
  6. Deactivate all your Plugins to ensure they're not causing the problem. Reactivate the problematic one. If it works, there maybe a conflict. Activate the others one-by-one and test the site to see if the problem ceases or returns, which may indicate the conflicting Plugin.

Uninstalling Plugins

To uninstall a WordPress Plugin:
  1. Go to Plugins screen.
  2. Find the Plugin you wish to deactivate and uninstall.
  3. Click Deactivate.
The Plugin will initiate the deactivation.
Most WordPress Plugins have an option to completely uninstall themselves, though not all. If you wish to remove a WordPress Plugin permanently:
  1. Check the WordPress Plugin instructions in the Details readme file on how to properly uninstall the Plugin.
  2. If the WordPress Plugin required the addition of code to the WordPress Theme, manually edit the Theme files to remove it.
  3. Deactivate the Plugin and remove it manually through your FTP program.
    1. Login to the site via your FTP Program.
    2. Go to the WordPress Plugins Directory and find where the Plugin is installed.
    3. Delete the WordPress Plugin folder and/or files from your server.

WordPress Plugin Tips

The following are WordPress Plugin tips and techniques for advanced users and developers.
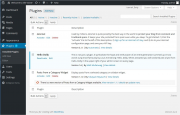
Plugin Management

Plugins are managed from the Plugins Screen in the Administration Screens of your WordPress site. All Plugins listed on this screen are found in your wp-content/plugins directory. Each Plugin has a description in its header section of what it does, an author and website to refer to, and a version number. If you do not see the Plugin in the list of installed Plugins, most likely it is missing the"File Header":
<?php
/*
Plugin Name: Magic Plugin
Plugin URI: http://example.com/magic-plugin
Description: Magic Plugin performs magic
Version: 2.3
Author: Mr. Magic
Author URI: http://example.com/
*/
The header section defines:
Plugin Name 
Shows the Plugin's name, and links to the Plugin's website if one is provided. Plugins listed in bold are currently active.
Version 
The version number of the Plugin.
Description 
The author's description of what the Plugin does and who authored the Plugin.
Action 
Allows you to activate, deactivate, or edit the Plugin.
New version available 
If a newer version of a Plugin is available in the WordPress Plugins Directory a message will display along with a link to the location to download that new version.

Theme Changes

Most WordPress Plugins no longer require direct modification to a WordPress Theme. If you are using a WordPress Plugin that does no, you need to know:
  1. Updates to the WordPress Theme may remove the Plugin modification code. Use a Child Theme or make notes to remind yourself to re-add the Plugin code to the updated Theme.
  2. If you change Themes, these changes will not carry over automatically to the new Theme. You will need to copy or add them manually to the new WordPress Theme, even if you use a Child Theme as the Child Theme is not associated with the new Theme.
  3. Upgrading WordPress may make changes to the code which could conflict with your WordPress Theme modifications. Use a Child Theme or manually check the Plugin's code to ensure it is still active.

Must-Use Plugins

If you are using the Multisite version of WordPress, Must Use Plugins are special WordPress Plugins installed in a special directory next to the normal /plugins/ dir (/mu-plugins/). They are 'must-use' because once their file is placed in the /mu-plugins/ directory they are instantly activated and cannot be de-activated using the Plugins Screen.
Must-use Plugins are useful for installing WordPress Plugins on all sites in a Multisite installation to make WordPress Plugins' functionalities available across the entire blog network. They are loaded before normal Plugins by PHP, which means that code and hooked-functions registered in an Must-use Plugin can be assumed available to all other Plugins.
See Must Use Plugins and Create A Network for more details.

Hiding Plugins When Deactivated

When activated, some WordPress Plugins add tags to the template files. Upon such a Plugin's deactivation, these tags may remain in place and can affect the look and/or functionality of the Theme, resulting in errors or even failures to load. It is therefore imperative to prevent the Plugin from being detected and used, if it is deactivated.
To determine if such a condition exists, you can add some php code to the template file where the Plugin was used, and perform a simple function_exists() check. To do so, add the code in the example below and configure it for the function you'd like to check. Then upload the modified template to your WordPress Content folder.
The if (function_exists()) checks for the Plugin, and if it exists (activated or not), it will use it. If it returns FALSE or "not found", it will ignore the Plugin tag and continue loading the page.
<?php
if (function_exists('FUNCTION NAME')) {
FUNCTION_NAME();
}
?>
This example Plugin uses a function called alex_get_shoutbox() to print out its contents.
<?php
if (function_exists('alex_get_shoutbox')) {
alex_get_shoutbox();
}
?>

How to install / activate wordpress theme ?

What is a Theme?

Fundamentally, the WordPress Theme system is a way to "skin" your weblog. Yet, it is more than just a "skin." Skinning your site implies that only the design is changed. WordPress Themes can provide much more control over the look and presentation of the material on your website.
A WordPress Theme is a collection of files that work together to produce a graphical interface with an underlying unifying design for a weblog. These files are calledtemplate files. A Theme modifies the way the site is displayed, without modifying the underlying software. Themes may include customized template files, image files (*.jpg,*.gif), style sheets (*.css), custom Pages, as well as any necessary code files (*.php). For an introduction to template files, see Stepping Into Templates.
Let's say you write a lot about cheese and gadgets. Through the use of the WordPress Loop and template files, you can customize your Cheese category posts to look different from your Gadgets category posts. With this powerful control over what different pages and categories look like on your site, you are limited only by your imagination. For information on how to use different Themes for different categories or posts, see The Loop in Action and Category Templates.

Get New Themes

The WordPress Theme Directory is the official site for WordPress Themes which have been checked and inspected, and are free for downloading. The site features the ability to search by type and style, and offers a demonstration of the page view elements of the Theme.

Using Themes

WordPress currently comes with three themes: the default Twenty Fifteen theme, and previous defaults Twenty Fourteen theme andTwenty Thirteen theme. You can switch between Themes using the Appearance admin panel. Themes that you add to the theme directory will appear in the Administration Screen > Appearance > Themes as additional selections.

Adding New Themes

Appearance Panel
There are many Themes available for download that will work with your WordPress installation.
If the Theme that you are installing provides instructions, be sure to read through and follow those instructions for the successful installation of the Theme. It is recommended that Theme developers provide installation instructions for their own Themes, because Themes can provide special optional functionality that may require more steps than the basic installation steps covered here. If your Theme does not work after following any provided instructions, please contact the Theme author for help.

Adding New Themes using the Administration Panels

You can download Themes directly to your blog by using the Add New Themes option in the Appearance sub-menu.
  1. Log in to the WordPress Administration Panels.
  2. Select the Appearance panel, then Themes.
  3. Select Add New.
  4. Either use the Search or Filter options to locate a Theme you would like to use.
  5. Click on the Preview link to preview the Theme or the Install Now link to upload the Theme to your blog,
  6. Or use the Upload link in the top links row to upload a zipped copy of a Theme that you have previously downloaded to your machine.

Adding New Themes by using cPanel

If your host offers the cPanel control panel, and the Theme files are in a .zip or .gz archive follow these instructions. Note: This assumes the Theme you download is a compressed (.zip) file containing a folder under which all the Theme files reside.
  1. Download the Theme .zip file to your local machine.
  2. In cPanel File Manager, navigate to your Themes folder. If your WordPress is installed in the document root folder of your web server you would navigate to "public_html/wp-content/themes" and if you have WordPress installed in a sub-folder called wordpress, you would navigate to "public_html/wordpress/wp-content/themes".
  3. Once you've navigated to the Themes folder in cPanel File Manager, click on Upload file(s) and upload that .zip file you saved in Step 1.
  4. Once the .zip file is uploaded, click on the name of that file in cPanel, then in the panel to the right, click on "Extract File Contents", and that .zip file will be uncompressed.
  5. Follow the instructions below for selecting the new Theme.

Adding New Themes Manually (FTP)

To add a new Theme to your WordPress installation, follow these basic steps:
  1. Download the Theme archive and extract the files it contains. You may need to preserve the directory structure in the archive when extracting these files. Follow the guidelines provided by your Theme author.
  2. Using an FTP client to access your host web server, create a directory to save your Theme in the wp-content/themes directory provided by WordPress. For example, a Theme named Test should be in wp-content/themes/test. Your Theme may provide this directory as part of the archive.
  3. Upload the Theme files to the new directory on your host server.
  4. Follow the instructions below for selecting the new Theme.

Selecting the Active Theme

To select a Theme for your site:
  1. Log in to the WordPress Administration Panels.
  2. Select the Appearance panel, then Themes.
  3. From the Themes panel, roll over the Theme thumbnail image for the Theme you are interested in to see options for that theme.
  4. You can view more information about any theme by clicking Theme Details.
  5. A live preview of any Theme (using your blog's content) can be seen by clicking Live Preview.
  6. To activate the Theme click the Activate button.
Your selection will immediately become active.
Note: If the Theme preview is blank, do not activate the new Theme without investigating further. Your site may not be displayed correctly, otherwise.

Wordpress : Resetting Your Password

In WordPress, there is more than one way to set your password. In normal circumstances, you can do it through the WordPress interface. If you forget your password, WordPress has a built in recovery mechanism that uses email.
But on some hosts, especially when email isn't working right, sometimes you have to take different steps to reset your password.
Here's a list of different ways to reset a password. Any one of them will work, and you only need one to succeed. Which method you will use depends on what type of access you still have to your website.


 Change Your Password

  1. In the Admin Panel menu, go to USERS
  2. Click on your username in the list to edit
  3. In the Edit User screen, scroll down to the New Password section and type in a new password in the two boxes provided. The strength box will show how good (strong) your password is.
  4. Click the UPDATE PROFILE button
Your new password takes effect immediately.

Through the automatic emailer

If you know your username or the email account in your profile, you can use the "lost password" feature of WordPress.
  • Go to your WordPress Login page (something like http://yoursite.com/wordpress/wp-login.php)
  • Click on the Lost your password? link
  • You will be taken to a page to put in some details. Enter your username or the email address on file for that account.
  • Wait happily as your new password is emailed to you.
  • Once you get your new password, login and change it to something you can remember on your profile page.

Through MySQL Command Line

  1. Get an MD5 hash of your password.
    • Visit md5 Hash Generator, or...
    • Create a key with Python. or...
    • On Unix/Linux:
      1. Create file wp.txt with the new password in it (and *nothing* else)
      2. tr -d '\r\n' < wp.txt | md5sum | tr -d ' -'
      3. rm wp.txt
    • On Mac OS X:
      1. Create file wp.txt with the new password in it (and *nothing* else), then enter either of the lines below
      2. md5 -q ./wp.txt; rm ./wp.txt (If you want the MD5 hash printed out)
      3. md5 -q ./wp.txt | pbcopy; rm ./wp.txt (If you want the MD5 hash copied to the clipboard)
  2. "mysql -u root -p" (log in to MySQL)
  3. enter your mysql password
  4. "use (name-of-database)" (select WordPress database)
  5. "show tables;" (you're looking for a table name with "users" at the end)
  6. "SELECT ID, user_login, user_pass FROM (name-of-table-you-found);" (this gives you an idea of what's going on inside)
  7. "UPDATE (name-of-table-you-found) SET user_pass="(MD5-string-you-made)" WHERE ID = (id#-of-account-you-are-reseting-password-for);" (actually changes the password)
  8. "SELECT ID, user_login, user_pass FROM (name-of-table-you-found);" (confirm that it was changed)
  9. (type Control-D, to exit mysql client)
Note if you have a recent version of MySQL (version 5.x?) you can have MySQL compute the MD5 hash for you.
  1. Skip step 1. above.
  2. Do the following for step 7. instead.
    • "UPDATE (name-of-table-you-found) SET user_pass = MD5('(new-password)') WHERE ID = (id#-of-account-you-are-reseting-password-for);" (actually changes the password)
Note that even if the passwords are salted, meaning they look like $P$BLDJMdyBwegaCLE0GeDiGtC/mqXLzB0, you can still replace the password with an MD5 hash, and WordPress will let you log in.

Through phpMyAdmin

This article is for those who have phpMyAdmin access to their database. Note: use phpMyAdmin at your own risk. If you doubt your ability to use it, seek further advice. WordPress is not responsible for loss of data.
Begin by logging into phpMyAdmin and clicking databases.
Image #2
  • A list of databases will appear. Click your WordPress database.
Image #3
  • All the tables in your database will appear. If not, click Structure.
  • Look for wp_users in the Table column.
  • Click on the icon for browse.
  • Locate your Username under user_login
  • Click edit (may look like a pencil icon in some versions of phpMyAdmin)
Image #4
  • Your user_id will be shown, click on Edit
  • Next to the user_pass is a long list of numbers and letters.
  • Select and delete these and type in your new password.
  • Type in the password you want to use. Just type it in normally, but remember, it is case-sensitive.
  • In this example, the new password will be 'rabbitseatcarrots'
  • Once you have done that, click the dropdown menu indicated, and select MD5 from the menu.
Image #5
  • Check that your password is actually correct, and that MD5 is in the box.
  • Click the 'Go' button to the bottom right.
  • Test the new password on the login screen. If it doesn't work, check that you've followed these instructions exactly.
 

Other Tutorials using phpMyAdmin

  • Reset a WordPress password from phpMyAdmin

Through FTP

There is also an easy way to reset your password via FTP, if you're using the admin user.
1. Login to your site via FTP and download your active theme's functions.php file.
2. Edit the file and add this code to it, right at the beginning, after the first <?php:
wp_set_password( 'password', 1 );
Put in your own new password for the main admin user. The "1" is the user ID number in the wp_users table.
3. Upload the modified file back to your site.
4. After you then are able to login, make sure to go back and remove that code. It will reset your password on every page load until you do.

Through WP CLI

WP CLI is a command line tool for managing your WordPress installation.
1. Move into the /wordpress directory and type
$ wp user list
to see all users. Find the ID of the user you'd like to update.
2. Then, update the user
$ wp user update 1 --user_pass=$UP3RstrongP4$$w0rd
replacing "1" with the id of the user you want to update.
More on wp cli

Using the Emergency Password Reset Script

If the other solutions listed above won't work, then try the Emergency Password Reset Script. It is not a Plugin. It is a PHP script.
Warnings 
  1. Requires you know the administrator username.
  2. It updates the administrator password and sends an email to the administrator's email address.
  3. If you don't receive the email, the password is still changed.
  4. You do not need to be logged in to use it. If you could login, you wouldn't need the script.
  5. Place this in the root of your WordPress installation. Do not upload this to your WordPress Plugins directory.
  6. Delete the script when you are done for security reasons.
Directions for use 
  1. Copy the emergency script from Emergency Password Script and put into a file called emergency.php in the root of your WordPress installation (the same directory that contains wp-config.php).
  2. In your browser, open http://example.com/emergency.php.
  3. As instructed, enter the administrator username (usually admin) and the new password, then click Update Options. A message is displayed noting the changed password. An email is sent to the blog administrator with the changed password information.
  4. Delete emergency.php from your server when you are done. Do not leave it on your server as someone else could use it to change your password.

Changing your password in older versions

To change your password in WordPress v1.2:
  1. In the Admin Panel, go to PROFILE
  2. Scroll down to the bottom and type in the new password in the two boxes provided
  3. Click the UPDATE PROFILE button
Your new password takes effect immediately.
To change your password in WordPress v1.5:
  1. In the Admin Panel, go to USERS
  2. From the "Your Profile" tab, scroll to the bottom and type in the new password in the two boxes provided.
  3. Click the UPDATE PROFILE button
Your new password takes effect immediately.
To change your password in WordPress v2.0:
  1. In the Admin Panel, go to USERS (or Profile)
  2. From the "Your Profile" tab, scroll down to the Update Your Password section and type in a new password in the two boxes provided.
  3. Click the UPDATE PROFILE button
Your new password takes effect immediately.

Top 50 CakePHP Interview Questions And Answers

(1) What Is Cakephp? 

CakePHP is a free, open-source, rapid development framework for PHP. It’s a foundational structure for programmers to create web applications. CakePHP goal is to enable developers to work in a structured and rapid manner–without loss of flexibility. CakePHP takes the monotony out of web development.


(2) When CakePHP Was Developed?

CakePHP started in April 2005.When a Polish programmer Michal Tatarynowicz wrote a minimal version of a Rapid Application Framework in PHP, dubbing it Cake.CakePHP version 1.0 released in May 2006.  (source:http://en.wikipedia.org/wiki/CakePHP)


(3) What Is The Current Stable Version Of CakePHP?

3.0 (on date 2015-06-12).


(4) What Is MVC In CakePHP?

Model view controller (MVC) is an architectural pattern used in software engineering.
Model      : Database functions exist in the model
View        : Design parts written here
Controller : Business Logic goes here

  • MVC Architecture of CakePHP

(5) Server Requirements For CakePHP.

Here are the requirements for setting up a server to run CakePHP:
An HTTP server (like Apache) with the following enabled: sessions, mod_rewrite (not absolutely necessary but preferred)
PHP 4.3.2 or greater. Yes, CakePHP works great in either PHP 4 or 5.
A database engine (right now, there is support for MySQL 4+, PostgreSQL and a wrapper for ADODB).


(6) How To Install CakePHP?

step1: Go to cakephp.org and download the latest version of cakephp.
step2: Cakephp comes in a .zip file,so unzip it.
step3: Extract the files in the localhost in the desired folder (for example:cakephp).
step4: Open the browser and run the URL localhost/cakephp
step5: Just Follow the instructions display on the page.


(7) What Is The Folder Structure Of CakePHP?

cakephp/
app/
Config/
Console/
Controller/
Lib/
Locale/
Model/
Plugin/
Test/
tmp/
Vendor/
View/
webroot/
.htaccess
index.php

lib/
plugins/
vendors/
.htaccess/
index.php/
README.md/

(8) What Is The Name Of Cakephp Database Configuration File Name And Its Location?

Default file name is database.php.default.
Its located at "/app/config/database.php.default".To connect with database it should be renamed to database.php


(9) What Is The First File That Gets Loaded When You Run A Application Using Cakephp?Can You Change That File?

bootstrap.php
yes it can be changed.Either through index.php , or through .htaccess

(10) What Is The Use Of Security.Salt And Security.CipherSeed In Cakephp? How To Change Its Default Value?

- The Security.salt is used for generating hashes.we can change the default Security.salt value in /app/Config/core.php.  
- The Security.cipherseed is used for encrypt/decrypt strings.We can change the default Security.cipherSeed value by editing /app/Config/core.php. 


(11) What Are Controllers?

A controller is used to manage the logic for a part of your application. Most commonly, controllers are used to manage the logic for a single model. Controllers can include any number of methods which are usually referred to as actions. Actions are controller methods used to display views. An action is a single method of a controller.


(12) What Is Default Function For A Controller?

index() function


(13) Which Function Is Executed Before Every Action In The Controller?

function beforeFilter()


(14) List Some Of The Features In CakePHP


  1. Compatible with versions 4 and 5 of PHP
  2. MVC architecture
  3. Built-in validations
  4. Caching
  5. Scaffolding
  6. Access Control Lists and Authentication.
  7. CSRF protection via Security Component.


(15) Using cakephp, what all are drawbacks.
It loads full application before it starts your task. It's not recommended for small projects because of its resource-heavy structure.


(16) What Is The Naming Convention In Cakephp?

Table names are plural and lowercased,model names are singular and CamelCased: ModelName, model filenames are singular and underscored: model_name.php, controller names are plural and CamelCased with *Controller* appended: ControllerNamesController, controller filenames are plural and underscored with *controller* appended: controller_names_controller.php,


(17) What Is Scaffolding In Cakephp? 

Scaffolding is a technique that allows a developer to define and create a basic application that can create, retrieve, update and delete objects.


(18) How To Add Scaffolding In Your Application?

To add scaffolding to your application,just add the $scaffold variable in the controller,
<?php
class PostsController extends AppController {
var $scaffold;
}
?>
Assuming you’ve created Post model class file (in /app/Model/post.php), you’re ready to go. Visit http://example.com/posts to see your new scaffold.


(19) What Is A Component In Cakephp?

Components are packages of logic that are shared between controllers. They are useful when a common logic or code is required between different controllers.

(20) What Are Commonly Used Components Of Cakephp?


  1. Security
  2. Sessions
  3. Access control lists
  4. Emails
  5. Cookies
  6. Authentication
  7. Request handling
  8. Scaffolding


(21) What is a Helper?
Helpers in CakePHP are associated with Presentation layers of application.Helpers mainly contain presentational logic which is available to share between many views, elements, or layouts


(22) What Are Commonly Used Helpers Of Cakephp?


  • FormHelper
  • HtmlHelper
  • JsHelper
  • CacheHelper
  • NumberHelper
  • Paginator
  • RSS
  • SessionHelper
  • TextHelper
  • TimeHelper

(23) What Is A Behavior?

Behaviors in CakePHP are associated with Models.Behaviors are used to change the way models behaves and enforcing model to act as something else.


(24) What Is The Difference Between Component, Helper, Behavior?

Component is a Controller extension, Helpers are View extensions, Behavior is a Model Extension.


(25) What Is A Element?

Element in cakephp are smaller and reusable bits of view code. Elements are usually rendered inside views.


(26) What Is A Layout?

Layout in cakephp are used to display the views that contain presentational code. In simple views are rendered inside a layout


(27) How To Set Layout In The Controller?

var $layout = ‘layout_name’;
to overwrite for a specific action use below code in that action
$this->layout =”layout_name”;


(28) How To Include Helpers In Controller ?

public $helpers = array(‘Form’, ‘Html’, ‘Js’, ‘Time’);
to in specific action use below code in that action
$this->helper[] =”helper_name”;


(29) How To Include Components In Controller ?

public $components = array(‘Emails’, ‘ImageUploader’, ‘Sms’);

(30) How To Write, Read And Delete The Session In Cakephp?

$this->Session->write(‘Bird.Color’, ‘Black’);
$black = $this->Session->read(‘Bird.Color’);
$this->Session->delete(‘Bird’); 

(31) What Is The Use Of $This->Set();

The set() method is used for creating a variable in the view file.Say for example if we write,
$this->set('posts',$posts); in controller fie, then the variable $posts will be available to use in the view template file for that action.


(32) What Is The Use Of $This->Set(Compact());

Using $this->set(compact()) , we can pass multiple parameters to access into the view file.

For example,
$this->set(compact('posts','users','reports'));
Now all these variables will be available in respective view file.


(33) What Are The Advantages Of Each?Which Would You Use And Why?

An advantage with first case $this->set('posts', $posts); is that it allows two different names for the view file and controller file. For example, you could write something like $this->set('postData', $posts);. Now the variable name in the view file would be $postData.

The advantage with the second approach $this->set(compact()); is easier to write, and useful especially when we are setting several variables to the view.No need to add separate line for each variable as we have with $this->set();
For example,
$this->set(compact('posts','users','reports'));


(34) Is It Possible To Have Multiple Validation Rules Per Field In Cakephp?

Yes its possible.


(35) What Is Wrong With The Below Validation Rule?

'email' => array(
'rule' => array(
'rule' => 'notEmpty',
'message' => 'Please Enter Email address.'
),
'rule' => array(
'rule' => 'email',
'message' => 'Entered Email address is invalid.'
)
)

The problem is the first rule notEmpty will never be called because email rule will overwrite it.While using multiple validation rules for the same field you must keep the rule key "unique". In this case if we want to use multiple rules then, we can simple change the rule key names like,
'email' => array(
'rule1' => array(
'rule' => 'notEmpty',
'message' => 'Please Enter Email address.'
),
'rule2' => array(
'rule' => 'email',
'message' => 'Entered Email address is invalid.'
)
)

(36) What Is The Difference Between Required And NotEmpty In Cakephp?

Difference between required and notEmpty


(37) How To Get Current URL In CakePHP?

To get current url in cakephp use, 

echo Router::url($this->here, true);
This will give full URL with hostname.If you want to get relative path instead of full URL,then use the following code:

echo $this->here;
This will produce absolute URL excluding hostname i.e. /controller/abc/xyz/


(38) How Can You Make Urls Search Engine Friendly While Using Cakephp?

It's an automatic task that is done by cakephp.


(39) Can You List Some Database Related Functions In Cakephp?

find, findAll , findAllBy , findBy , findNeighbours and query.

(40) Which Methods Are Used To Create And Destroy Model Associations On The Fly?

The bindModel() and unbindModel() Model methods are used to create and destroy model associations on the fly. 


(41) What Is The Use Of RequestAction Method? 

The method requestAction is used to call a controller’s action from any location and returns data from the action.


(42) What Is Recursive In Cakephp? 

To understand this topic follow this post :
Recursive in cakephp


(43) How Can We Use Ajax In Cakephp?

By calling ajax helper and then using it in controller for rendering.


(44) What Is Habtm?


Has and belongs to many is a kind of associations that can be defined in models for retrieving associated data across different entities.


(45) How Cakephp URL Looks In Address Bar?

http://example.com/controller/action/param1/param2/param3


(46) How Can You Include A Javascript Menu Throughout The Site. Give Steps.

By adding the javascript files in webroot and call them in default views if needed everywhere or just in the related veiws.


(47) Why Cakephp Have Two Vendor Folder?What Is The Difference Between Two Vendors Folder Available In Cakephp?

There will be two vendor folders available in cakephp frame work.
one in ” app ” folder and one in root folder

The vendor folder in the app folder is used to place the third-party libraries which are application specific.
The vendor folder in the root folder is used to place the third-party libraries which are used for multiple applications.


(48) What Is The Default Extension Of View Files In Cakephp?Can We Change It?If Yes Then How?

default extension of view files is '.ctp'.
yes we can change it by writing public $ext = '.yourext'; in AppController.If you want to change it for particular controller then add it into that controller only.You can also change it for the specific action of the controller by putting it in that action of controller.
public $ext = '.yourext'; in AppController
- you can change all the views extentions.

public $ext = '.yourext'; in specific controller like, PostsController
- you can change all the views extentions of PostsController.

public $ext = '.yourext'; in specific controller action like, index()
- you can change the view extention of index.ctp
Note: You cannot specify multiple extensions, however it seems like there is a fall back to .ctp if no .php file is found.


(49) How Can You Set Custom Page Title For The Static Page?

To set a custom page title, copy-paste following code anywhere in your static page (.ctp) file:
$this->set("title_for_layout", "My page title");


(50) How To Display The Schema Of The Model?

If you want to display the schema of particular model then you just need to add the following single line of code.For example we have “Posts” Controller.
pr($this->Post->schema());